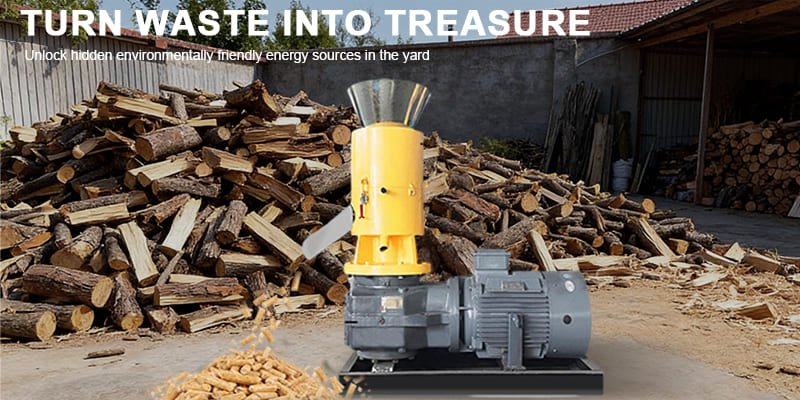
You're tired of high heating bills and that pile of wood waste in your yard. It’s frustrating to pay for fuel when a potential, eco-friendly energy source1 is right there.
To make wood pellets2 at home, follow four key steps: crush raw materials3 like branches and sawdust4 into a fine powder, dry the material to 8-12% moisture, press it through a homemade flat die pellet mill5, and finally, cool the finished pellets before storage.

Over my 25 years in this industry, I've seen massive factories churn out thousands of tons of pellets. But honestly, nothing is more satisfying than helping someone on a small farm or in their own workshop turn their waste into value. It’s an empowering feeling to create your own fuel. Many think it's too complicated, but it's very achievable with the right knowledge and tools. Let's walk through the process together.
What Raw Materials Can You Actually Turn Into Pellets?
You want to make your own fuel, but you're worried about using the wrong materials. Using treated wood could release toxic fumes, while other materials might not form pellets at all.
You can use almost any clean, dry biomass6. This includes sawdust4, wood shavings, branches, leaves, hay, and even peanut shells. The most important rule is to use only natural, untreated materials to ensure your pellets burn safely and cleanly.

Choosing the right ingredients is the foundation of a good pellet. I've heard horror stories from people who tried to pelletize laminated wood or old painted furniture. The result is a foul-smelling, potentially toxic fuel that can damage their stove and their health. The golden rule is: if it's natural and clean, it's likely a good candidate. Sawdust and wood shavings are perfect because they are already small. Larger items like branches or wood scraps just need a bit more prep work. Sticking to pure biomass6 ensures you create a high-quality, environmentally friendly fuel7 source for your home.
Acceptable vs. Unacceptable Raw Materials
| Material Type | Good Raw Materials (Clean & Safe) | Bad Raw Materials (Avoid These) |
|---|---|---|
| Wood Byproducts | Sawdust, wood shavings, wood chips | MDF, particleboard, painted or treated wood |
| Agricultural Waste | Straw, hay, corn stalks, peanut shells | Any material with high pesticide residue |
| Yard Waste | Small branches, twigs, dry leaves | Wet or rotting material, soil-contaminated waste |
How Do You Prepare Raw Materials for Perfect Pellets?
You have your wood, but it's too big and wet to use. Throwing it into a pellet mill5 like that will only result in clogs and frustration, not usable pellets.
Proper preparation involves two crucial steps: crushing and drying. First, use a machine like a hammer mill8 to grind your material down to a uniform size of less than 6mm. Then, dry this powder until its moisture content9 is between 8% and 12%.

This preparation stage is where 90% of pelleting problems are solved before they even start. If the material is too large, it won't be able to fit through the small holes in the pellet die. A hammer mill8 is the perfect tool for this, as it takes inconsistent branches and chips and turns them into a uniform, almost flour-like powder. Next is moisture, which is the most critical variable. If the material is too dry, it won't stick together. If it's too wet, it will create steam and clog the die. The 8-12% moisture range is the sweet spot. You can achieve this by sun-drying the material for a day or two, but for consistent results, I always recommend using a simple moisture meter to be sure.
| Moisture Content | Pelletizing Result | Why It Happens |
|---|---|---|
| Below 8% | Powdery pellets that easily fall apart. | Not enough moisture to act as a binder under pressure. |
| 8% - 12% | Ideal. Strong, dense, shiny pellets. | Perfect balance for lignin to activate and bind material. |
| Above 15% | No pellets, machine clogs with mushy material. | Excess steam pushes material out of die holes. |
What's the Best Machine for Making Pellets at Home?
You see the giant, expensive machines used in factories and think pellet making is out of reach. You need a practical, affordable solution for your garage or small farm.
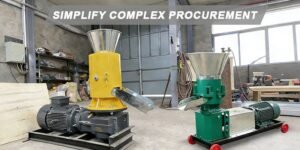
A flat die pellet mill5 is the perfect machine for DIY production. These mills are smaller, more affordable, and their simple design is ideal for home use. They come with different power options, like electric motors, diesel engines, or PTO attachments for tractors.

This is the workhorse of the small-scale producer. At STROSEN, we see that while industrial clients need massive ring die mills, our customers in places like the United States, Australia, and Germany love the flat die design for its simplicity and reliability. It works using a straightforward principle: a set of rollers rotates over a stationary, horizontal die plate. The rollers press the prepared material down through the holes in the die, creating pellets. It's an elegant and effective system. The choice of power source depends entirely on your setup. Electric models are quiet and great for indoor workshops. Diesel and gasoline models offer portability. And PTO (Power Take-Off) models are perfect for farmers who can hook the mill directly to their tractor's engine.
| Power Type | Best Use Case | Advantages |
|---|---|---|
| Electric | Garages, workshops with power access. | Quiet, no emissions, easy to start. |
| Diesel | Farms, remote areas without electricity. | Powerful, portable, high torque. |
| PTO | Farms with a tractor. | Uses existing equipment, very powerful. |
How Do You Finish and Store Your Pellets Safely?
The pellet mill5 is producing hot, slightly soft pellets. If you just pile them up, they will break apart and trap heat and moisture, which leads to mold and ruins your hard work.
Once the pellets exit the machine, you must cool them immediately. Spread them out in a thin layer to air dry, which allows them to harden. After they are completely cool and hard, store them in sealed, moisture-proof bags in a dry location.

This final step is what ensures your pellets last. The heat generated during compression activates the natural lignin in the wood, which acts as a glue. Cooling solidifies this bond, making the pellets dense and durable. For small batches, simply spreading them on a clean tarp on the floor works great. For larger amounts, a dedicated pellet cooler uses a fan to speed up the process. Once they are at room temperature, get them into bags or sealed buckets. Moisture is the enemy of wood pellets2. Any dampness will cause them to swell and disintegrate back into sawdust4. Always store them off the ground in a dry shed or garage. Also, remember basic safety: operate your mill in a well-ventilated area and wear protective gear like gloves and safety glasses.
Conclusion
Making your own wood pellets2 is a practical way to turn waste into valuable fuel. By properly preparing your materials and using a flat die mill, you can create a sustainable energy source10.
Learn how eco-friendly energy sources like wood pellets contribute to a greener planet and lower emissions. ↩
Explore the advantages of wood pellets as a sustainable heating option and how they can reduce your energy costs. ↩
Discover the best raw materials for making wood pellets and ensure your fuel is safe and effective. ↩
Find out how sawdust is transformed into high-quality wood pellets and its benefits in the process. ↩
Get tips on selecting the right pellet mill for your home production needs. ↩
Explore various biomass options that can be used to create efficient and clean-burning pellets. ↩
Explore the environmental benefits of using wood pellets as a renewable energy source. ↩
Learn about the role of hammer mills in preparing raw materials for pellet making. ↩
Understand the importance of moisture content in pellet production for optimal results. ↩
Learn how wood pellets play a vital role in promoting sustainable energy practices. ↩